
How Are Machine Made Rugs Produced?
Discover a Complete Summary of Each Step
By: Russell Webb

Let's start with the top five steps in rug making using high tech machinery.
Machine-made rugs are produced using specialized machines that are designed to create various types of rugs. There are several steps involved in the process of making machine-made rugs, including:
Step 1. Designing the rug: The first step in the process is to create a design for the rug. This can be done using computer-aided design software like adobe illustrator or by hand drawing the design.
Step 2. Creating the pattern: Once the design has been finalized, the next step is to create a pattern for the rug. This involves creating a template or map that shows the placement of each individual element in the design.
Step 3. Cutting the yarn: The yarn that will be used to create the rug is then cut into the appropriate lengths and colors according to the design.
Step 4. Weaving the rug: The yarn is then fed into the machine, which uses a series of needles and looms to weave the yarn into the desired pattern. The machine may be programmed to create a variety of different patterns and designs, depending on the specific rug being produced.
Step 5. Finishing the rug: Once the rug has been woven, it is usually trimmed and cleaned to remove any loose ends or debris. The rug may also be treated with a finishing agent to protect it from stains and fading.
Machine-made rugs are typically made from synthetic materials, such as nylon or polypropylene, which are easier to work with and more durable than natural materials like wool or silk. They are also generally less expensive to produce than handmade rugs, making them more affordable for consumers.
There are several types of machines that can be used to make rugs:
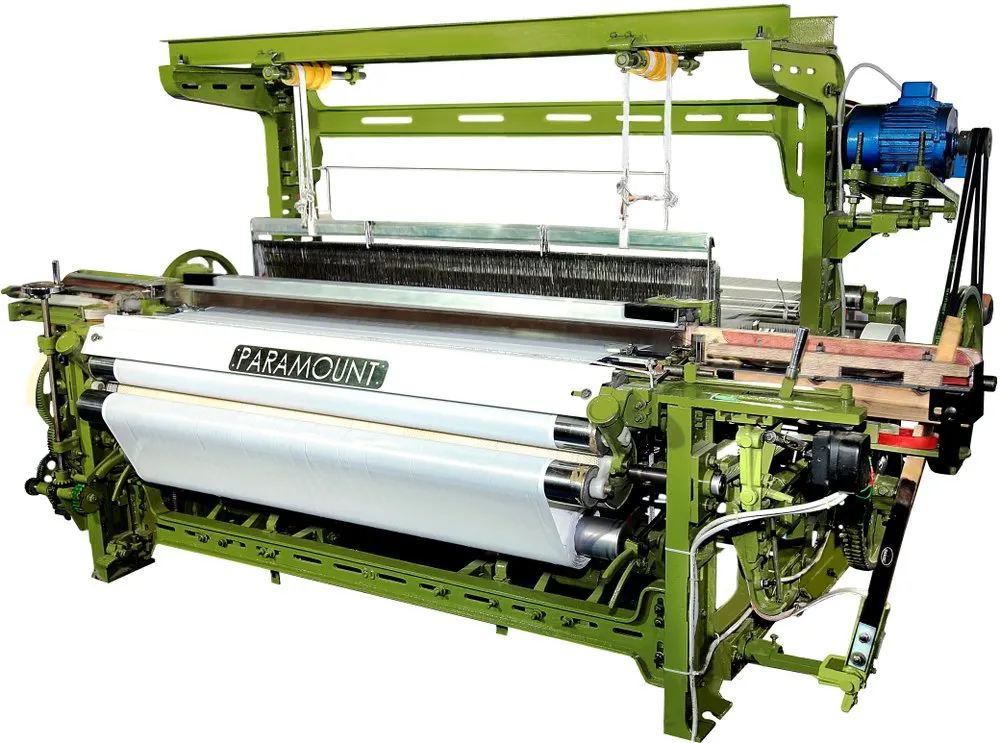


Power looms: Power looms are large, automated machines that use a series of needles and looms to weave yarn into a rug. They can be programmed to create a variety of different patterns and designs, and they can produce rugs quickly and efficiently.
Tufting machines: Tufting machines use needles to create piles of yarn on a backing material, creating a tufted rug. Tufting machines can create a range of different pile heights and styles, and they are often used to make area rugs and carpet tiles.
Knitting machines: Knitting machines use needles to knit yarn into a rug, similar to the way that a sweater is knitted. Knitting machines can create a range of different patterns and textures, and they are often used to make shag rugs or other textured rugs.
Braiding machines: Braiding machines use a series of interlocking loops of yarn to create braided rugs. Braiding machines can create a range of different braid styles and sizes, and they are often used to make braided area rugs or accent rugs.
In addition to these specialized machines, other equipment may also be used in the process of making machine-made rugs, such as cutting machines to trim the yarn to the appropriate length, and finishing equipment to clean and treat the rugs.
Let’s take a closer look at each step of the rug making process. We’ll start with the Design process:

Designing a rug involves creating a visual concept for the rug
Begin by determining the specific elements that will be included in the design. There are several steps that can be followed when designing a rug, including:
Step 1. Determine the purpose of the rug: The first step in designing a rug is to consider its purpose and intended use. Will it be used as a decorative element in a living room or bedroom, or will it be used in a high-traffic area like a hallway or entryway? Will it be used indoors or outdoors? Answering these questions can help you determine the appropriate size, style, and materials for the rug.
Step 2. Choose a color palette: The next step is to select a color palette for the rug. This can be based on the colors of the room where the rug will be used, or it can be chosen to create a particular mood or atmosphere. Consider using a combination of bold and neutral colors to add interest to the design.
3. Sketch out the design: Once you have a general idea of the style and color palette for the rug, sketch out a rough design using pencil and paper. Consider the placement of different elements, such as patterns, borders, and motifs.
Step 1. Refine the design: Once you have a rough sketch, refine the design by adding more detail and refining the placement of elements. You may want to use computer-aided design (CAD) software to create a more accurate and detailed design.
Step 4. Create a pattern: The final step in the design process is to create a pattern for the rug, which will be used to guide the production process. The pattern should include a detailed map of the placement of each individual element in the design, as well as instructions for the color and type of yarn to be used.
Creating a pattern for a rug involves creating a detailed map or template
This template will show the placement of each individual element in the design. The pattern should be as detailed as possible, including information about the color and type of yarn to be used for each element. Here are some steps that can be followed when creating a pattern for a rug:
Step 1. Measure the size of the rug: The first step in creating a pattern is to determine the size of the rug. Measure the width and length of the area where the rug will be placed, and consider any additional dimensions that may be needed, such as borders or fringe.
Step 2. Sketch out the design: Sketch out the design for the rug using pencil and paper, or use computer-aided design (CAD) software to create a more detailed and accurate design. Consider the placement of different elements, such as patterns, borders, and motifs.
Step 3. Create to scale: Determine the scale of the pattern, which is the ratio between the size of the pattern and the size of the finished rug. For example, if the pattern is drawn at a scale of 1:10, this means that every 1 inch on the pattern represents 10 inches on the finished rug.
A) Add the details: Add the details of the design to the pattern, including the color and type of yarn to be used for each element. Use symbols or codes to indicate the different elements, and include detailed instructions for the placement and orientation of each element.
B) Check for accuracy: Once the pattern is complete, check it for accuracy to ensure that all elements are properly placed and sized. Make any necessary adjustments to the pattern before proceeding with the production process.
Weaving a rug involves using a machine to create a specific color, pattern or design using yarn
Weaving a rug requires a high level of skill and attention to detail to ensure that the finished product meets the desired specifications and quality standards.
There are several steps involved in the process of weaving a machine made rug with power looms, including:
Step 1. Prepare the machine: Before beginning the weaving process, make sure that the machine is properly set up and calibrated. This may involve adjusting the tension of the yarn, setting the correct speed and loom width, and ensuring that all needles and other parts are in good working order.
Step 2. Load the yarn: Load the yarn into the machine, making sure to follow the correct color and pattern sequence as indicated by the pattern or design plan. Make sure to keep the yarn organized and free from tangles to prevent delays during the production process.
Step 3. Start the weaving process: Once the machine is prepared and the yarn is loaded, start the weaving process by pressing the start button or activating the machine manually. The machine will use a series of needles and looms to weave the yarn into the desired pattern.
Step 4. Monitor the process: Monitor the weaving process closely to ensure that the machine is operating properly and that the yarn is being woven into the desired pattern. Make any necessary adjustments to the machine or yarn as needed to ensure that the finished rug meets the desired specifications.
Step 5. Finish the rug: Once the rug is complete, stop the machine and remove the finished rug from the loom. Trim any loose ends or debris from the rug, and prepare it for the next step in the production process, such as finishing or packaging.
Finishing a rug involves completing the final steps in the production process to prepare the rug for use or sale
Finishing a rug may involve several different tasks, including:
Step 1. Trimming: Trimming involves removing any loose ends or debris from the rug to give it a clean, finished appearance. This may be done using scissors or a specialized trimming machine.
Step 2. Cleaning: Cleaning the rug involves removing any dirt or stains that may have accumulated during the production process. This may be done using a vacuum cleaner, a brush, or a specialized cleaning solution like Folex.
Step 3. Finishing: Finishing the rug involves applying a protective coating or treatment to the rug to protect it from stains, fading, and other damage. This may be done using a spray-on or brush-on finish, or by subjecting the rug to a finishing process such as heat setting or chemical treatment.
Step 4. Packaging: Packaging the rug involves preparing it for transport or storage, which may involve rolling or folding the rug, and placing it in a protective cover or bag.
Finishing a rug is an important step in the production process, as it helps to ensure that the rug is ready for use or sale and that it will remain in good condition over time.
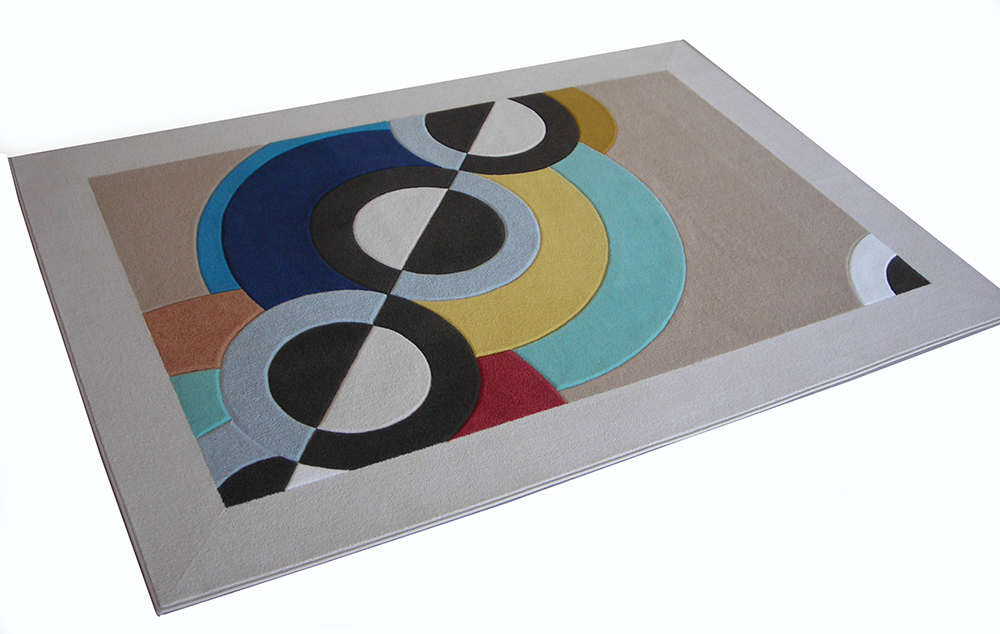
Note: this site features custom made area rugs. We teach students how to produce high-end area rugs, tapestries, custom staircase runners, and wall-to-wall installations.
We use machine made carpet in all of our rugs. However, we purchase these materials direct from the carpet mills who use broadlooms (power-looms).
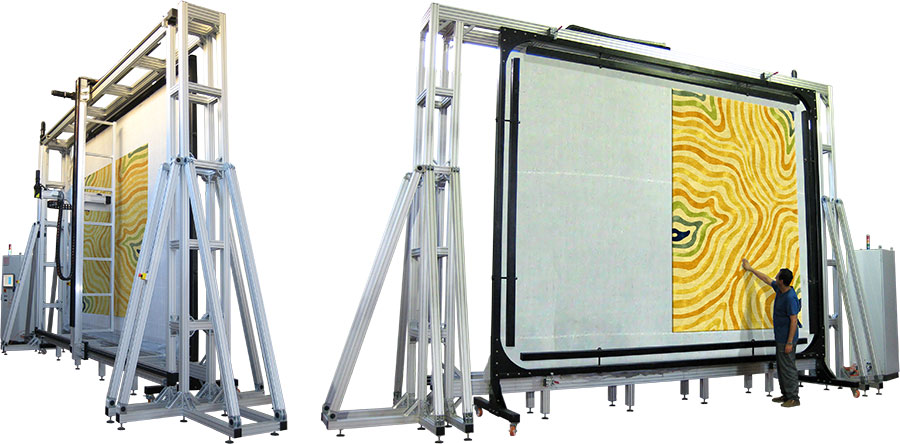
We create the design on our computer, then we order the styles and colors we need direct from the mill, then we fabricate the area rug using our custom inlay method. This is an efficient, cost effective way to make amazing high-end custom rugs.

Check out a variety of Power Loom Technologies for more research.

Russell Webb
Russell has been designing & fabricating premium custom rugs since 1991. He has helped 100’s of companies, gov agencies, & private clients with their custom rug needs. And he is absolutely convinced this is the best creative home based business opportunity you will find online.
SHARE
You may also like our top ranked articles

Check out ProSource Wholesale as a future supplier for your materials. They’ve been good to me over the years.
